|
|
||
|
|
|
Westchester Web Design |
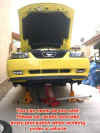
When you are working under your vehicle, make sure it is supported by secure jack stands. There is always accident reports indicating someone has perished because of working under a car that was only supported by the jack. Do not take any chances. If you do not feel 100% comfortable, then don't do this!!
To get the best of both
worlds with your naturally aspirated Mustang, you want the engine
to breath in easier and exhale easier. After upgrading to a Cold
Air Intake , I wanted to ensure that the exhaust was doing
as well as the intake. The installation of a Bassani O/R X-pipe
left us X-static , very X-cited , X-tremely satisfied and it was X-actly
what we was hoping for.
Now I am not going to kid you here, the installation of the Bassani
X-Pipe went well, but wasn't without it's little problems.
This job is best done with the car on a full lift, but it can be pulled
off on jacks, it just takes a little more patience and a lot more
getting up and down.
The first step is to remove the existing stock H-pipe from the exhaust
manifolds. Now Ford and their better ideas didn't make it super
easy to get at these manifold bolts, so I now have an appreciation
for those who are trying to tighten header bolts. This pic is
from below the driver side foot well looking up the converter to the
manifold bolts.

The passenger side was a major pain in the butt and a swivel or universal
socket is a must. This side is a flat mating flange as opposed
to the flared fitting like the driver side.

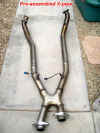
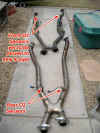
We wanted to get X-cited again and decided to assemble the X-pipe
to get a good look at what was in store for the installation. This
pic shows the X-pipe pieced together before getting the front O2 sensors
and before getting installed on the car. Be very careful removing
the stock O2 sensors from the stock H-pipe and be even more careful
not to cross thread them into the X-pipe.


The OEM H-pipe came out very easily. There is some bulk here, we are
sure the X-Pipe shaved a couple of pounds.
Install the 2 fitted pipes separately to the manifold and leave them
slightly loose so that you can jockey and shift them around
when actually putting the X-Pipe on. Now for the X-Pipe.
You don't want any sag, so adjusted the tails up slightly for tightening.
Shimmy here, wiggle there, check to make sure the clamps are on and
we are off to the races.
Here is the X-Pipe all installed, O2 sensors tied off with MIL eliminators, clamps all tight, lets get the tires on and see what shakes.
found @ http://www.mustanghowto.com


