|
|
||||||||||||
|
|
|
Westchester Web Design |
Ford Mustangs are famous for having a very accepting aftermarket. The GT and Cobra Mustangs have always had numerous exhaust kits available through the aftermarket. From Cat-Back kits to mid pipes to headers, a full exhaust on a Mustang will surely make an enthusiast smile from ear to ear and make bystanders turn heads in fascination.
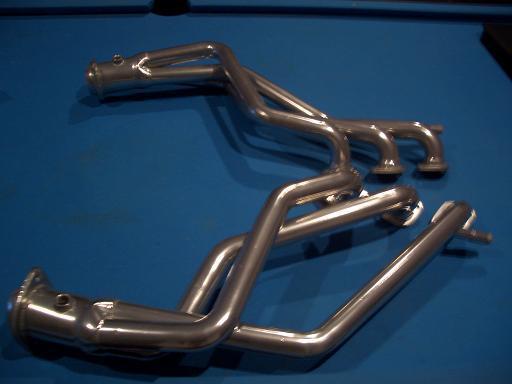
Although the aftermarket has been welcoming the V8 model Mustangs with arms wide open, the V6 model has been slow to gain aftermarket support. However, over the past few years, several companies have been fabricating and producing more involved aftermarket modifications for the V6. One of these companies, Mac, manufactures a set of Long Tube headers for the V6. This kit mates with an off road or prochambered shorty midpipe and a Cat-Back from a GT Mustang. Now V6 Mustang owners who want to get the better flow (up to 38rwhp on modified engines- “MM&FF”) and sound of long tube headers can do so through two different coatings from Mac. The basic coating is called HTS Coated, the higher quality is a Ceramic Coated set.
Parts:
Long Tube Headers
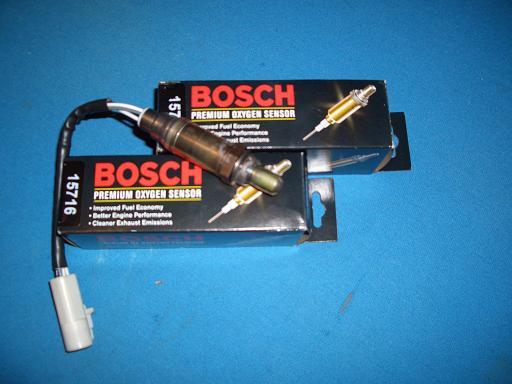
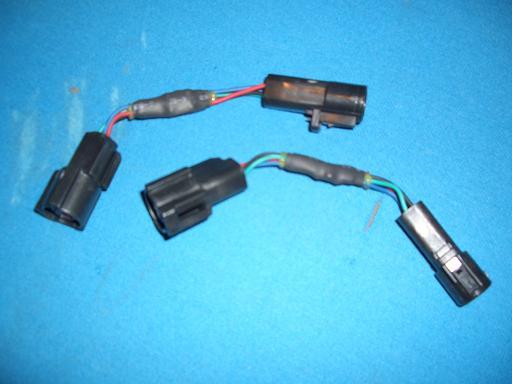
MIL Eliminators
Expected Time:
4 Hours
Expected Materials Needed:
Long Tube Headers (MAC shown)

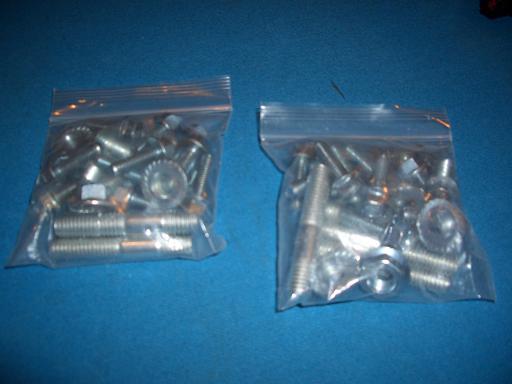
Hardware
Expected Tools Needed:
Jack
Jackstands (2)
Various Socket/Ratchet combinations and sizes
Crescent Wrench
Sawzall
Welder (optional)
Expected Procedure:
Removal of the stock system:
Jack the front of your Mustang
into the air with about 12 inches of space
below the front two wheels. Place supporting jack stands beneath the K-Member
and then let the jack loose.
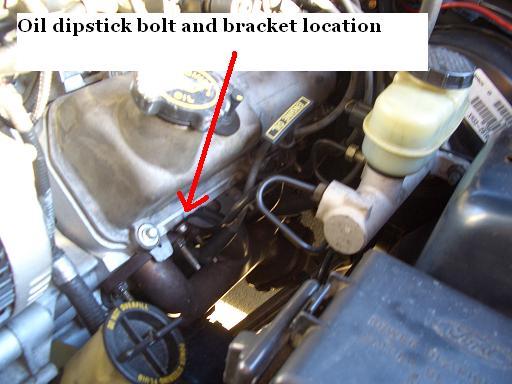
Pop the hood and disconnect the oil dipstick bracket from the driver’s side of the engine. One bolt holds this in place.
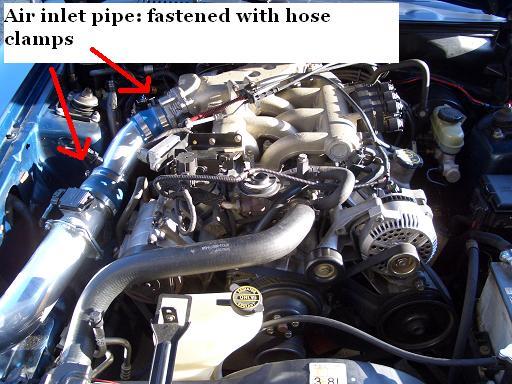
Move to the passenger side of the engine compartment and remove the air inlet pipe from the throttle body to the mass airflow sensor. A flat head screwdriver will suffice here.
Now, disconnect the EGR system. Pull the two hose lines free, and then use the crescent wrench to disconnect the EGR pipe from the passenger exhaust manifold and the EGR pump at the engine.

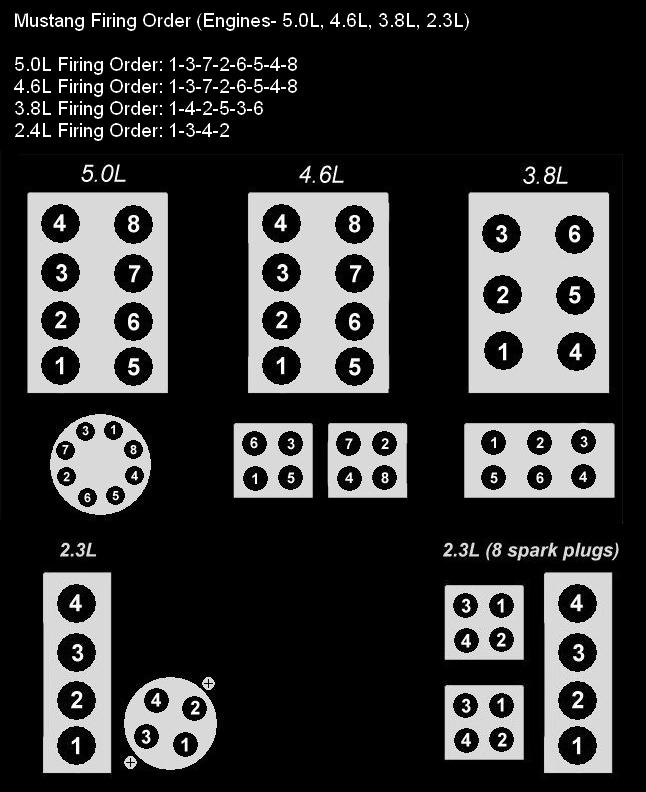
Remove all 6 spark plug wires and all of the spark plugs on the passenger side. Remember the firing order for 3.8L Mustangs is as follows:
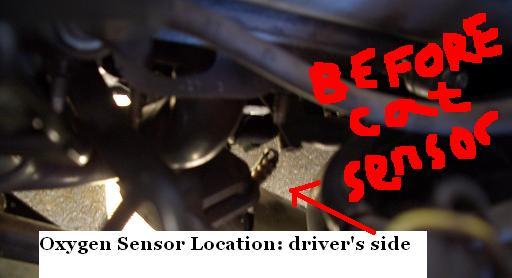
Now, unbolt the stock exhaust manifolds (headers) from the midpipe and drop the midpipe down from the headers. Also remove the oxygen sensors.
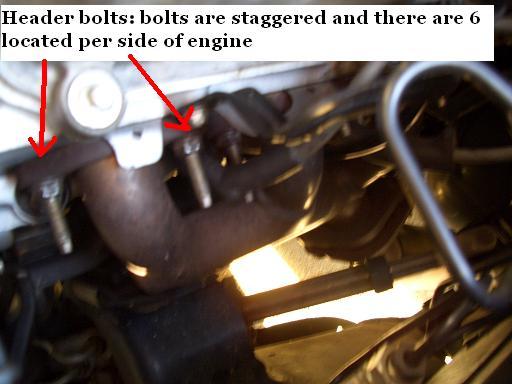
Next, unbolt the stock headers from the engine. The headers are held in by 6 bolts each. We used air tools to make this task easier.
The driver’s side exhaust manifold will need to be removed by pulling it down under the engine compartment; the passenger side manifold must come up through the engine compartment.
Now, prepare to install you nice, new long tube headers!
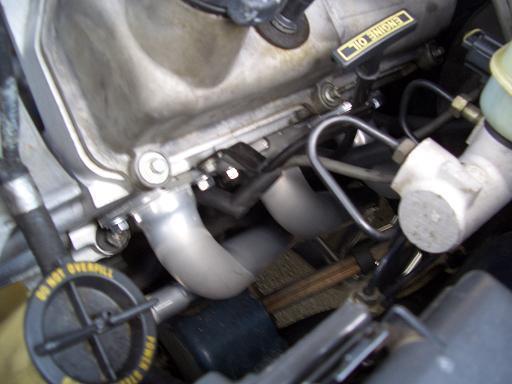
The passenger side is the more difficult of the two, by far. On the passenger side, you must bring the long tubes up from the bottom of the engine compartment and the fitment is tight, to say the least. Place your new manifold gaskets on your headers and utilize your new hardware to bolt on the long tubes.
Tip: Work from back to front of the engine when installing the bolts for the long tubes.
After you get the passenger side header bolted on, reconnect the EGR lines to the header and the EGR pump fixed at the front of the engine. You can also go ahead and reinstall your air inlet pipe and spark plugs/wires at the passenger side at this point.
Now, move on to installing the driver’s side long tube header.
Tip: The oil dipstick line and bracket need to be fixated between the rear-most two pipes of the header.
You will also install this one from the bottom of the engine up. The fitment is much more roomy on the driver’s side, and bolting it up with the same pattern (rear to front) makes this side much easier to do. Be sure to place the gasket on before installing, and utilize the new stainless steel hardware as well.
After bolting on the driver’s side long tube header, you can now reinstall the spark plug wires and all of the oxygen sensors.
Now you can move out of you engine compartment since you have completed the installation of the headers.

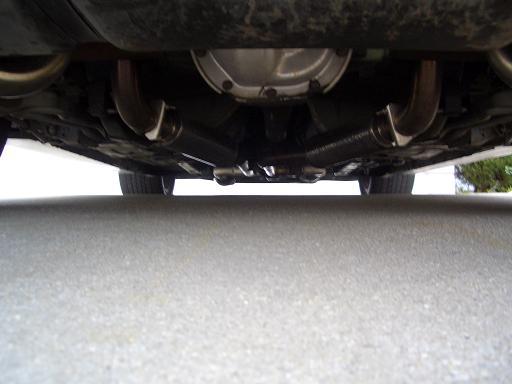
For a clean bolt-on look, you can use the Mac Shorty H Pipe, but we just re-fabricated my already custom H pipe.
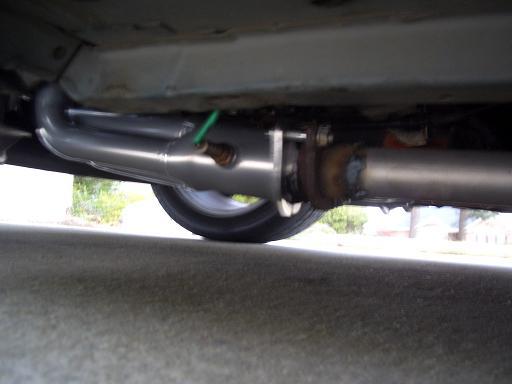
To get a leak free fit, we cut the flange off of the front of the first catalytic converter and welded it to my H pipe. We cut the pipe back 2 1/2? to line it up perfectly with the long tube headers on the driver’s side.
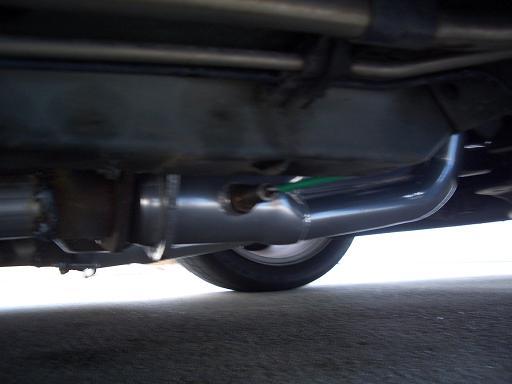
For the passenger side, we had to cut back 2 1/2? and weld the flange just like the driver’s side, but in addition to that, we had to cut a 1 1/2? section out of the 90degree bend of the H pipe to move it closer to the driveshaft to receive a perfect fit.
After lining up the H pipe segments and bolting the flanges to the collector pipe, we welded it all in place to ensure no leaks.
Now, you are ready for the electrical portion of this project.
Simply plug your MIL Eliminators into the rearmost oxygen sensors and then plug the reverse end of the MIL’s to the harness of the oxygen sensor. This will ensure the check engine light will remain in proper function, but a code for emissions will not be set for the sensors detecting no catalyst in the exhaust.
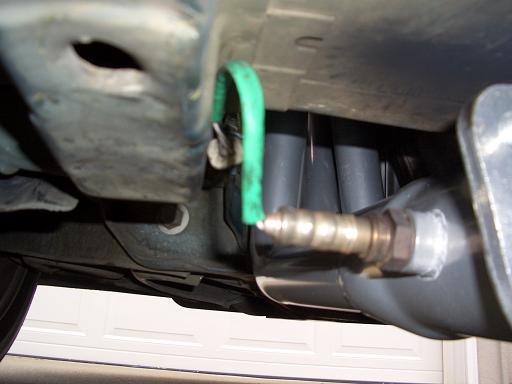
Now, plug the oxygen sensor extenders into the front two oxygen sensors and then tuck them out of the way of heat.
Now, jack the car up off of the jack stands and remove them from under the car. Next, lower the car and you are ready to test fire and make sure there are no leaks.
Leaks? weld them up or head to a muffler shop to have them weld it for you.
No leaks? fire her up and wake the neighbors! You are now ready to enjoy more power and more sound whether it be on the road or at the track!
Found
at: http://www.moddedmustangs.com |