|
|
||||||||||||
|
|
|
Westchester Web Design |
What you need:
1. 3...yes three 2x4 1/2 inch thick pieces of MDF
2. 80 Grit Sandpaper
3. 2 Heavy-duty hinges (from the cabinet isle...plan to install them reversed
to hide them)
4. Clear primer/sealant for the MDF...the thing about cutting MDF that
most people aren't aware of is that by cutting it u are exposing untreated
wood...being that this wood is gunna be in your car it will collect moisture..once this happens it starts to release fa-mal-da-hyde
(sp?)...since its in a small enclosure (a car) its not good stuff to breathe
in
5. 4 large home depot cardboard boxes to use as templates
6. 2 5" Bolts
7. 4 Nuts
8. 2 Locking Washers and 2 Regular Washers
9. Mechanics Wire
10. 3/16" Wooden Dowel
11. 10 1/2" Wood Screws
12. Carpeting (I got mine at Best Buy. Ask the dudes in the car audio section for the carpeting, THEY'RE STASHING IT!)
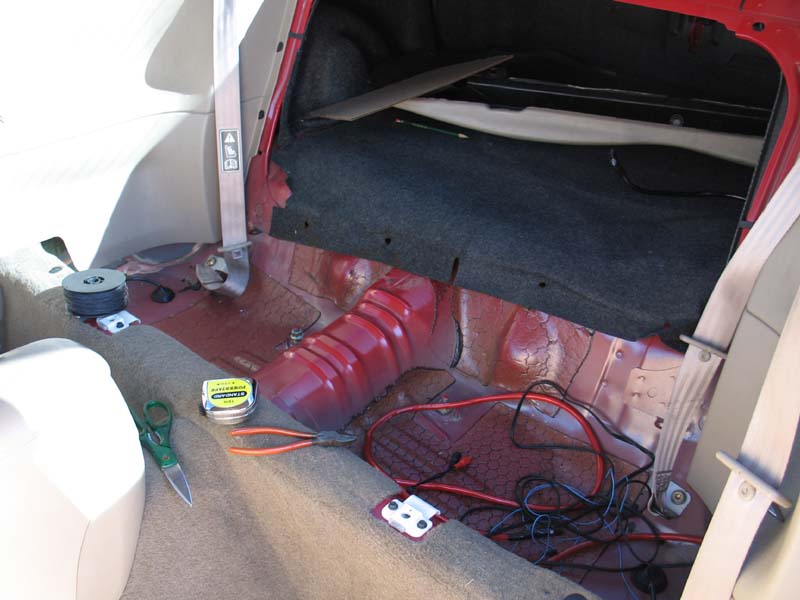
First off in order to do this project, you need to take out your rear
seat. Information on this can be had i believe in the bullitt archive,
it is also in your handy Haynes.
After you have successfully ripped the useless rear seats out, you are
ready to begin.
The first step of this project is one of the longest and most grueling
part of this whole thing. You are ready to begin to trace your templates!
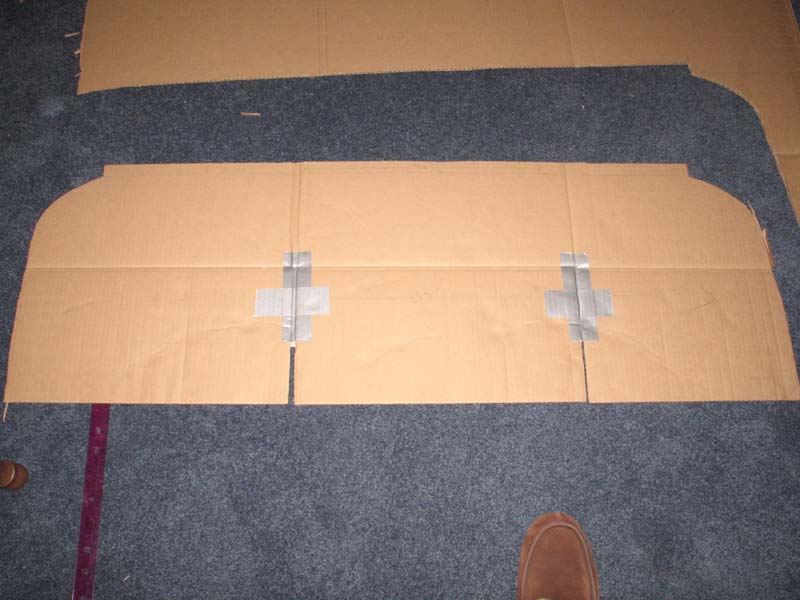
The way I did this was to cut the folding tabs off of the large cardboard
boxes for you have and easier time working with cardboard instead of trying
to cut a huge piece to fit. These I will call the "Small templates" These
small templates are only for the arm rest or side areas. THERE IS NO NEED
TO TRACE STRAIGHT LINES! Here Is what I am referring to:
The way I accomplished making these templates is by using the mechanics
wire, molding it to the interior trim as shown below:
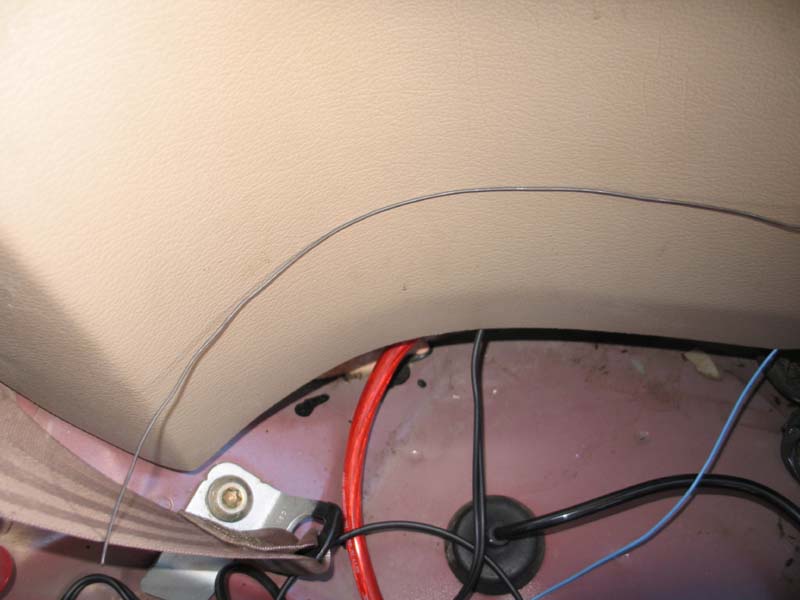
Once I did this I then copied the form onto the cardboard with a pencil.
After I traced it I then cut it out with scissors/razor. Once I finished
that I put it in the car for fitment. If it didn't fit properly I would
do the same thing again or adjust the form with my eyes by making pencil
marks on the cardboard THEN tracing the updated form onto a new piece
of cardboard, alternating back and fourth between the two pieces.
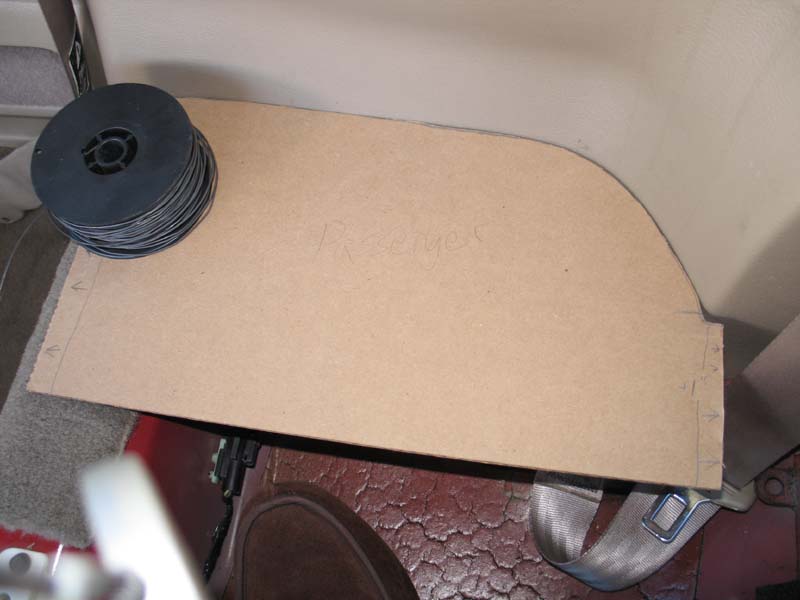
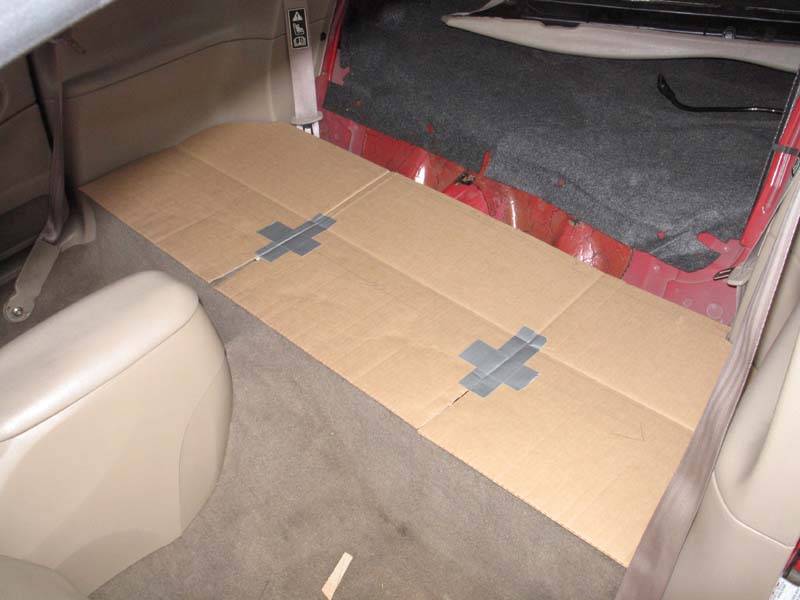
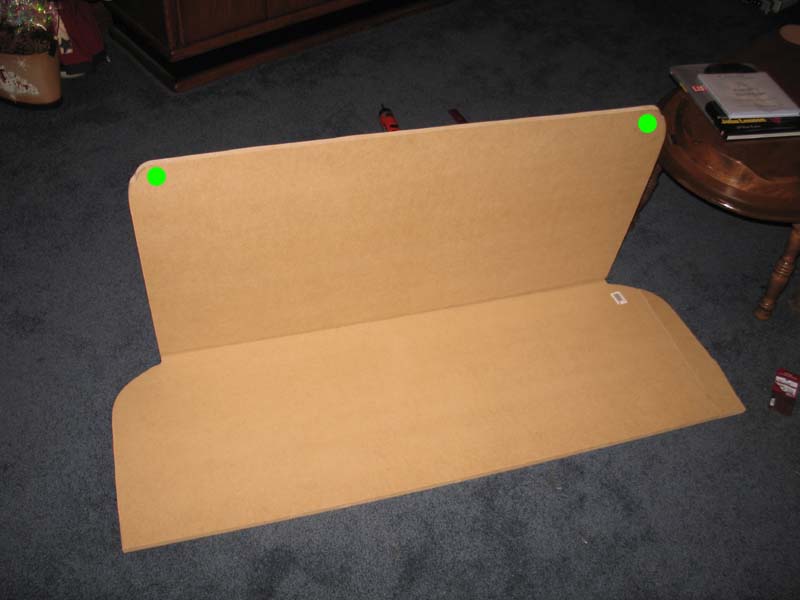
Eventually, I was satisfied with what I had and took proper measurements
of the straight lines and then took the small templates to make the "Large
template" which is the actual size piece that you will fit into your
car, like so:
If your template is to your standards, trace it on to your MDF.
NOTE!!! The 2x4 piece of MDF is NOT long
enough for the BENCH portion. Unfortunately it is two inches too short.
The way to fix this is to take the third piece of MDF and cut off 4 inches
of it and attach it to the other board. How I did this was I drilled three
matching holes into the sides of both pieces. The side being the edge
or thickness of the board. I then took the 3/16" dowel and cut it into
3 much smaller pieces. I filled the holes with wood glue and put the dowels
into the holes and merged the two pieces together.
After you have made this quick fix for the bench, trace your large bench
template onto the longer MDF. Then cut it out! Bring it into the car and
see if it fits. If it does, spray it with the sealant and set it aside.

Repeat this same process (minus the extension part) to the back panel
portion. This took me a little more time. Just have patience!
Once you have both pieces of MDF cut out AND sealed, you're now ready
to install the hinges.
If you plan on installing subs in your RSD, now is the time for you to
make the proper measurements and cuts in the wood for them. (TIP: I traced
the circles and drilled a hole in the wood as a starter for my jig saw
blade)
If you are in fact cutting holes for subs, make sure to seal the newly
exposed wood.
At this point you should install the RSD as it is now back into your car
to see how it looks AND to mark off where you need to drill holes for
securing the back to the car.
Next, take the panels out of your car and drill the proper holes for the
bolts. Note: These holes will have to be drilled on a slight angle depending
on how your back board is situated in the car. They should be drilled
roughly here:
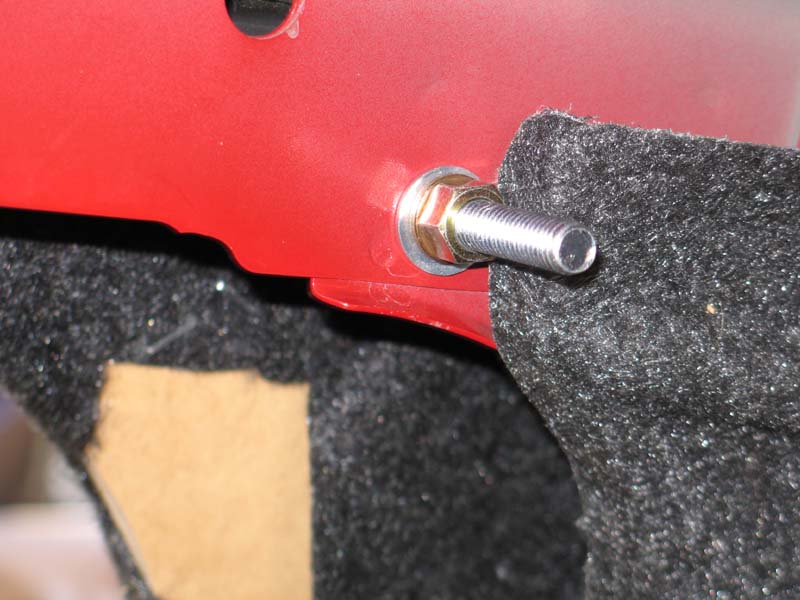
After you have drilled the holes place the bolts through the board with
the head of the bolt on the front side of the panel. The bolts will be
covered up by the carpeting (If done my way)
Next, carpet! Carpet or upholstery your RSD however you would like. I
chose sub box carpeting and used a staple gun to attach it to the wood.
It may not be what you're looking for but it does the job with out a sticky
mess.
When done carpeting, place a nut on each bolt and run them all the way
down. These will make for the stopping places of the back board when secured
to the car.
Once you have mounted the RSD into the car, feed the bolts through the
two holes (I will show you in two seconds). Now take your regular washers
and locking washers and put them onto the bolts with the last two nuts.
Tighten the nuts down and you have secured your back panel.
It should look something like this:
If you have subs, now is the best time to install them after you're finished
with the RSD because you can reach into the back to tighten the nuts down
via the sub holes. If you don't have sub holes then you are gunna have
to climb into your trunk to tighten everything down.
Final Note: If you can take out your rear seatbelts, PLEASE DO. They don't
serve any purpose anymore and it makes it look a lot better.
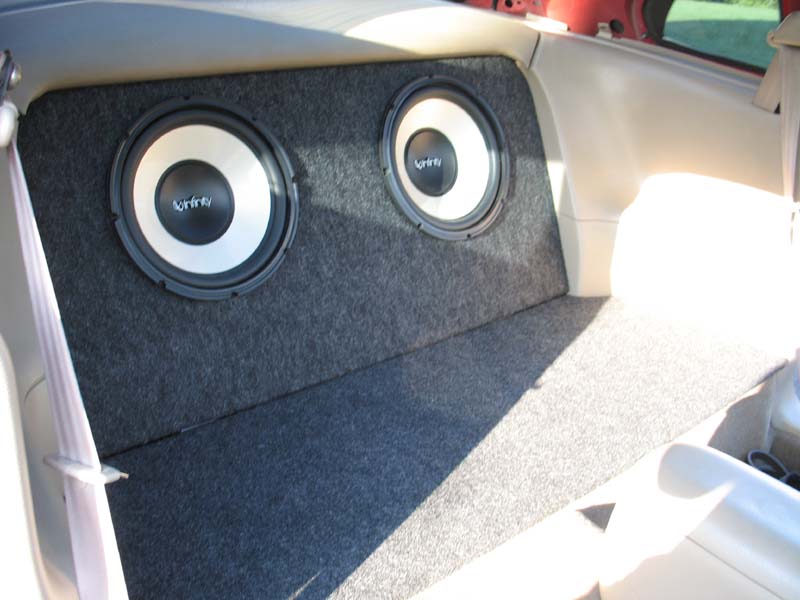
After a few days, a few beers, swear words and some nicks on the knuckles,
you just might have something looking like this
If you guys have any questions or need some pictures of something just
ask me and ill run out and take them!
By: -=NightHawk=- found @ http://www.stangnet.com