|
|
||||||||||||
|
|
|
Westchester Web Design |
Well
this will be my second write up,
but this one will be on gears. Key note this was on a 5.0L but same
principles apply to a newer mustang with a 8.8 rear end the only difference
is the disc portion and abs sensor. but i will note what is needed for
that also. I took a total of 4Hrs to do patience is a key thing here..
First of on tools needed: (*some are special tools*)
I might of mentioned other tools i used during the install not mentioned
hereon the list
1) if available impact gun other wise a 1/2 breaker bar or ratchet
2a.) socket in 1/4in. drive 8mm only
b.) socket(s) in 3/8in. drive 12mm 12pt., 13mm, 15mm, 19mm
c.) sockets in 1/2in. drive 19mm, 1 1/16in.
3a.)1/4in., 3/8in., 1/2in. ratchet
b) 3/8in swivel
4) wrenches 8mm, 13mm,
5) E8 female torx
for the ABS sensor located in the back of the rear disc
6) *magnetic base indicator* , *0-6" digital caliper*, *press* * in/lbs
TQ wrench*
7) pry bars different sizes, punch
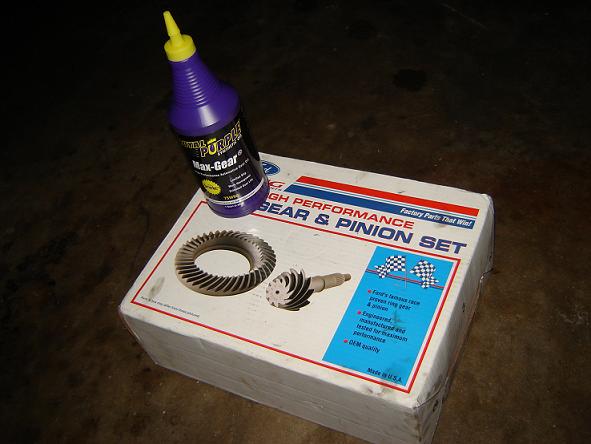
Ok now here we go on to the install gears and fluid used where FRPP
3.73's and Royal purple diff fluid comes with friction additive
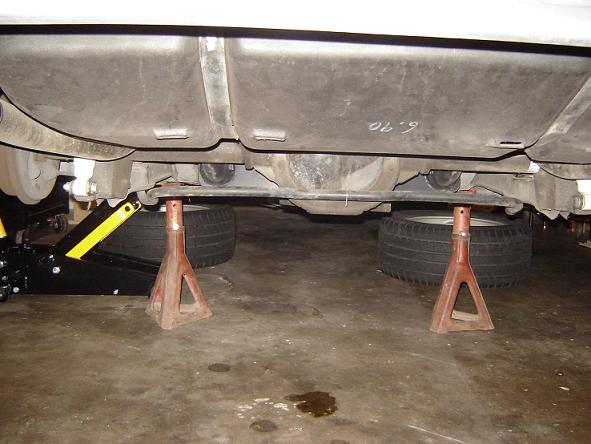
First of I used a craftsman professional jack to raise the car, and
had some decent size jack stands to make the room necessary to clear
for the install. Removed both rear wheels to be able to remove C- clip
later on in the process.
See pic
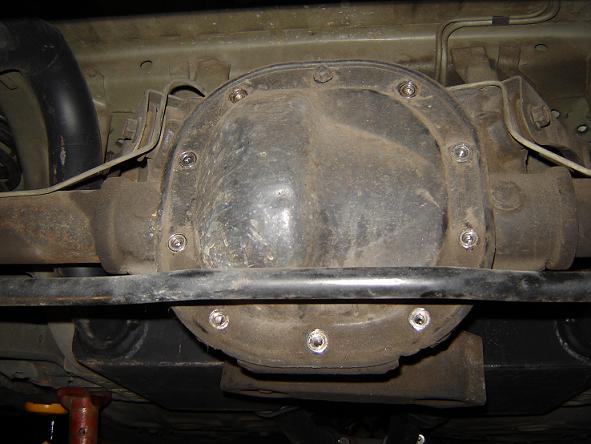
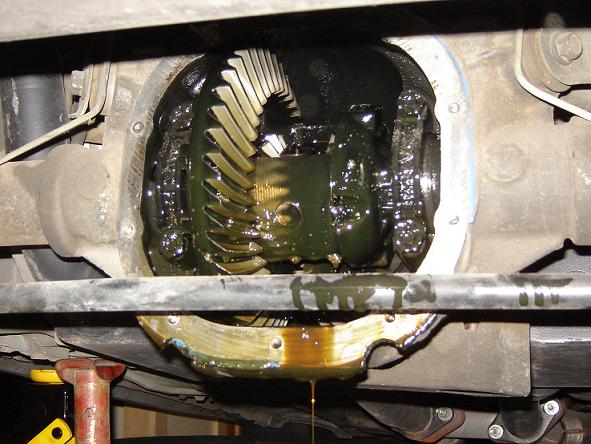
Now i removed the bolts with a 13mm short and deep socket on the rear
diff cover except for the top bolt just loosened it up a bit. I use a screwdriver to pry the cover open slowly to release the
fluid so it wouldn't get all over the place, now you will need a pan
that can hold at least 3qts., then once all fluid is drained remove
the top bolt.You can see what i mean in the pic below.
For the mustangs that have a rear disc set up you will need the 13mm wrench to remove the top part of the caliper
once that is removed a 15mm wrench or socket with ratchet to remove the
bottom portion to be able to remove the disc. No pic shown... sorry
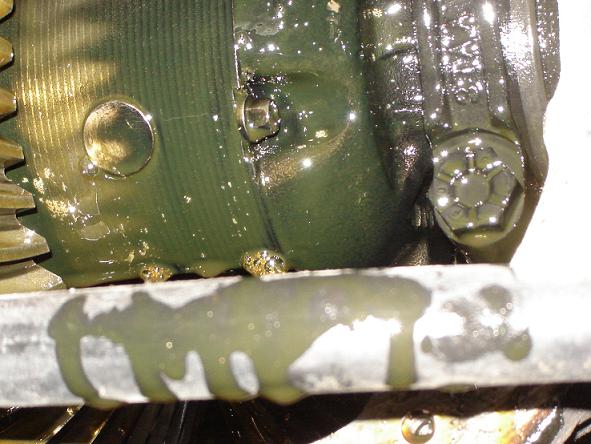
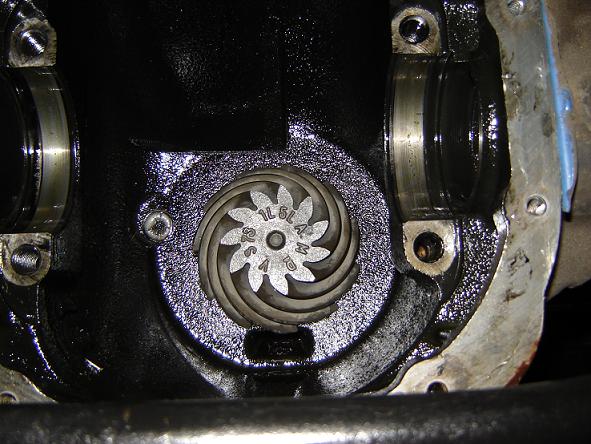
Now that the rear Diff cover is off you will need the 8mm wrench to
remove the shaft locking bolt. Shown in pic
after you will need to rotate the carrier about 180* for the shaft to
slide out. After this you will push in the half shafts to remove the
C-clips and the slide the shafts out slowly so not to damage the seal.
A 19mm socket will be needed to remove the cap screws on the carrier
caps. They are tight so i would recommend using a 1/2 in. ratchet with
long handle to break them loose. Important note everything that is removed
must go back to the same spot and mark the caps left and right. You
don't want to mix these up. Once that
is out the way you will need a pry bar to push the carrier up for it to pop out * Be careful this thing is heavy * the races will
come out along with the carrier.
With the carrier removed you will now take the drive shaft out there
are holes there to put a punch in to lock it in place to be able to
remove the bolts. Important these bolts are 12pt. so only a 12pt. socket
will be needed. Once the drive shaft is removed the bolt that holds
the pinion is a 1 1/16in. you can use the 1/2 in. ratchet but i chose
my impact gun. Once the that is removed you will need a hammer preferably
a rubber mallet to push the pinion out here is where things get tricky
for those that don't really know how to do it.
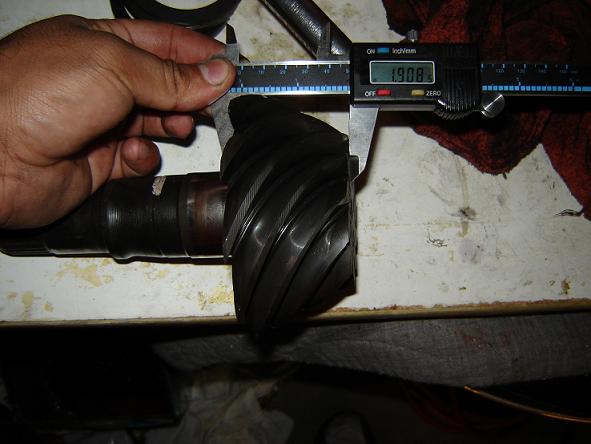
Here you will need a bearing puller to remove the bearing on the pinion,
once the bearing is removed you will have the shim that goes with that.
i used the MHD setup for the shimming process. I had asked a trusty
friend of mine also about this and most of the time you can use the
same shim form the old one on to the new one, but to make sure i used
my 0-6" digital caliper to measure this and i got 1.908 on the old one
with the shim i put that shim on the new pinion and measured got the
same thing. Just incase you get something different use the shims that
come in the kit to get the measurement form the old pinion. Now you
will need a press to press the bearing on the new pinion i had one so
it was easy.
After all that i reinstalled the pinion with new crush aleeve and tighten
the new nut down here is where you will need a in/lbs TQ wrench another
special tool to get the proper rotational TQ or drag on the pinion.
All specs will be written in the end.
Now onto the carrier a vice will be required to remove the bolts to
replace the ring gear. After the bolts have been removed a couple of
taps from the hammer will be needed to pop it loose. Now you can remove
the carrier to slip the new ring gear on, once that is done you will
bolt up the ring gear to the carrier
first do 5 bolts in a star pattern to seat it then bolt the rest and
use lock tight on those bolts they will be TQ to 70-85 ft./lbs.
After that reinstall the carrier along with the races. Here comes the
most time consuming and where patience is really put to the test for
a first timer... because you will need to put the carrier shims back
now this is the key part on install, they are tricky to put back but
it's doable now i did all new bearings and races so the kit came with
new shims i had to use those since the ones that came out wouldn't give
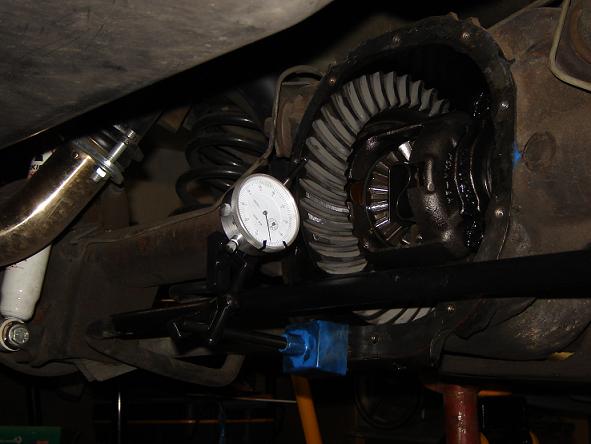
me proper backlash. Here is where the back lash part come into affect
i tighten the bolts down just snug and checked back lash until i got
it right, and i had to add and subtract shims this took me about an
hour to get right. This part will make the difference in a good install
or a bad one. Here is a pic
So once i got that done and it was correct i TQ the caps down to 70-85
ft/lbs. and also checked the wear pattern and it was dead on after this
i put everything back together, put the drive shaft, cover and filled
with fluid...
Well this install took me about 4Hrs but the payoff is great now i took
it on a road test no whines or noises.
TQ specs took these from my friend:
pinion pre load = 8-14 in/lbs (used bearings)
pinion pre load = 16-25 in/lbs (new bearings)
ring gear bolts = 70-80 ft /lbs
bearing cap bolts = 75-85ft/lbs
pinion shaft bolt = 10-15ft/lbs
drive shaft bolts = 85-95ft/lbs
back lash .008-.015" try to get it around .010-.012"
well that's my write up on how i did the install. Another key note it will be easy if you do
have mechanical skills and the tools required for this job otherwise
just pay for the install to be done by a professional or you will be
sorry...
found @ http://www.stangnet.com