|
|
||||||||||||
|
|
|
Westchester Web Design |
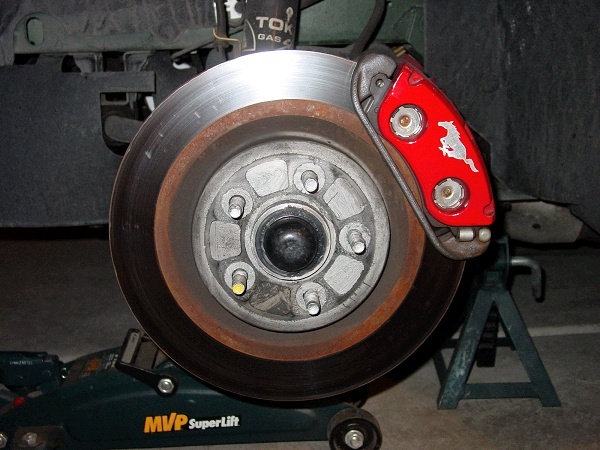
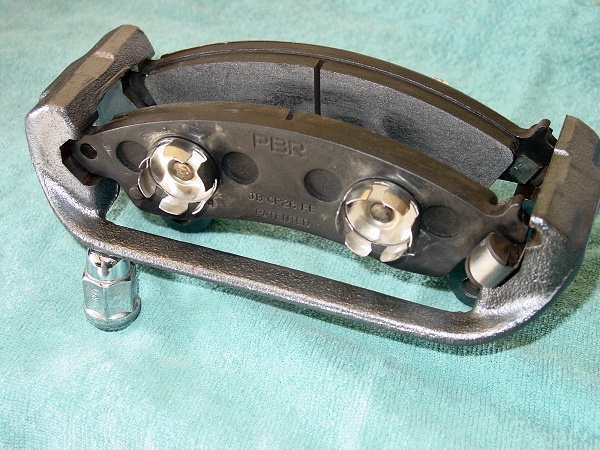
The Cobra front brakes by PBR are pretty simple and the pads are very easy to change.
First I raised
the wheel up and remove the tire. Used a jack stand to make sure it was
safe to work on.
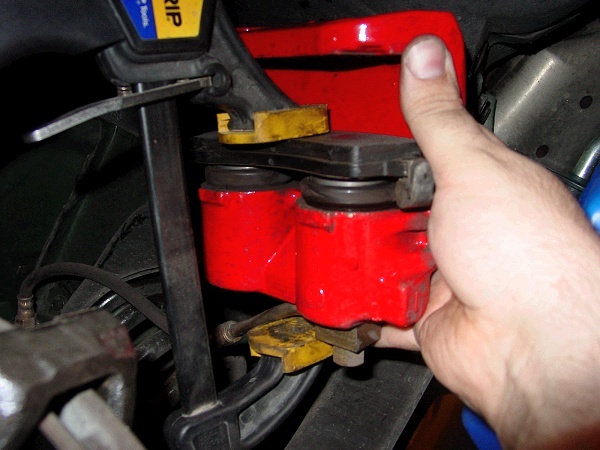
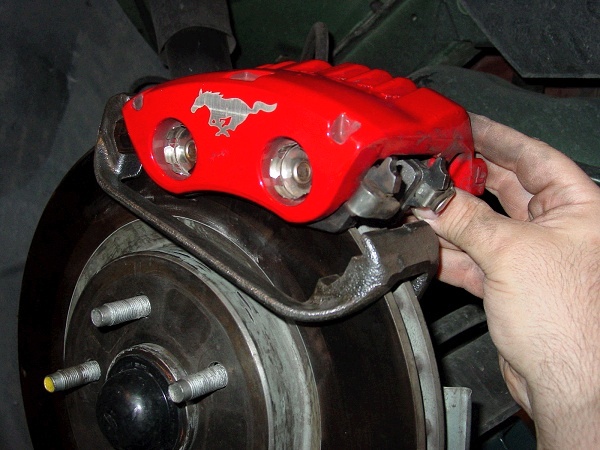
Removing the
caliper
To remove the caliper you will need to remove the E-clip off the pin located
on the bottom of the caliper
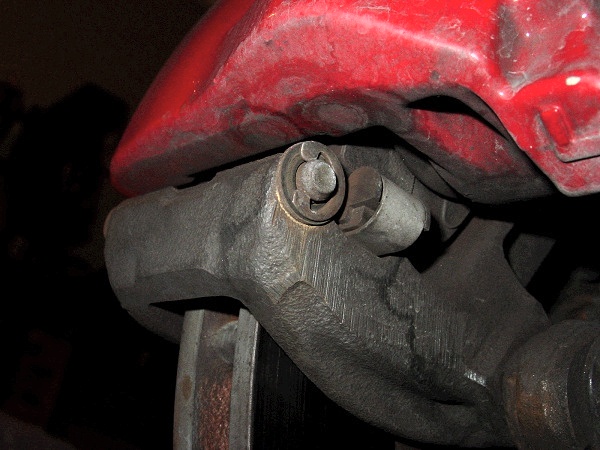
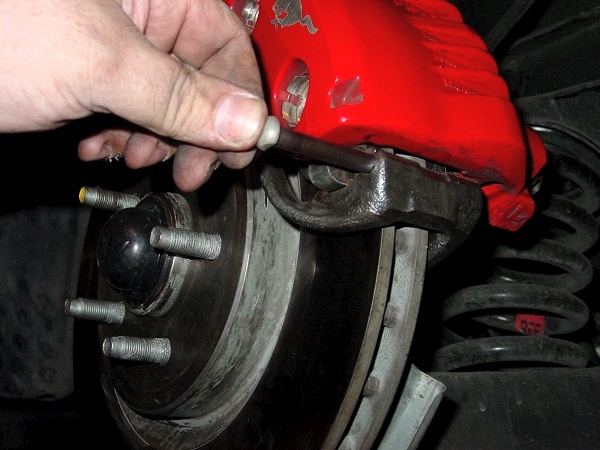
Use a screw driver to pry off the E-clip or use a pair of needle nose pliers. To gain better acess, push the pin all the way in.
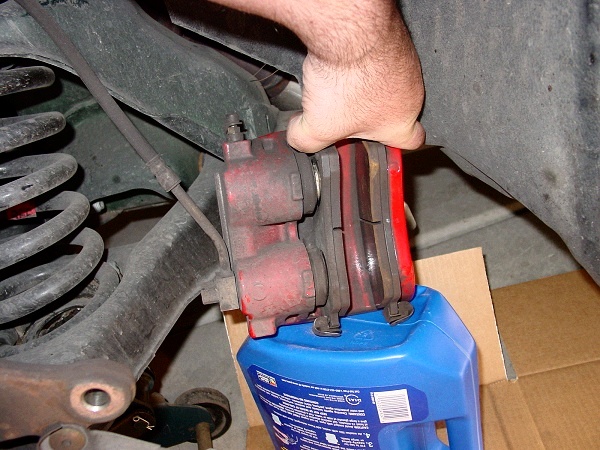
Once the E-clip is removed and you pull the pin out, you can push the caliper up. You may have to push up on the springs at the bottom of the pads near the retaining pin to clear the bracket.
I normally set the caliper on something so it does not hang by the brake line. You can also use wire to hang the caliper off a spring coil. Watch the paint though.
Removing the
pads
The the inboard pads are retained by the springs and simply presses into
the pistons. On the outboard the springs press into the caliper.
You should be
able to push one side and once it starts coming off the other side will
follow.
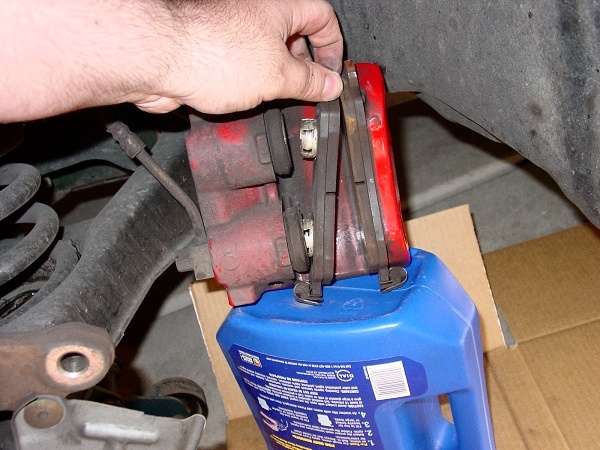
If it is tight
you may need to pry it off with a screwdriver, be careful because the
red paint will chip.
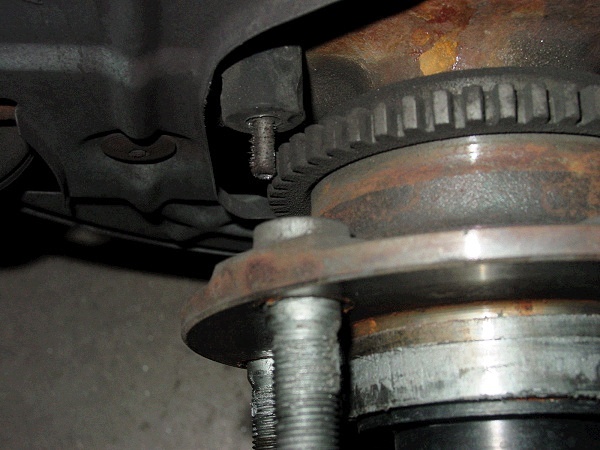
NOTE:Something
you might ant to check while here is the ABS sensor for wheel movement.
I believe it is magnetic and you will find metal ships covering it. I
like to remove those while I have access to it.
Installing the pads into the caliper
To install the pads press them into place.
Note:On the OME inboard pads, that fit against the pistons, there is a piece of insulation on the pad and also two small round ones that fit inside of the retention springs. This insulation is there to help keep from heating up the brake fluid in the caliper. If the neighbor Vern stops by make sure he does not swap the pads on you and you end up taking it apart again.
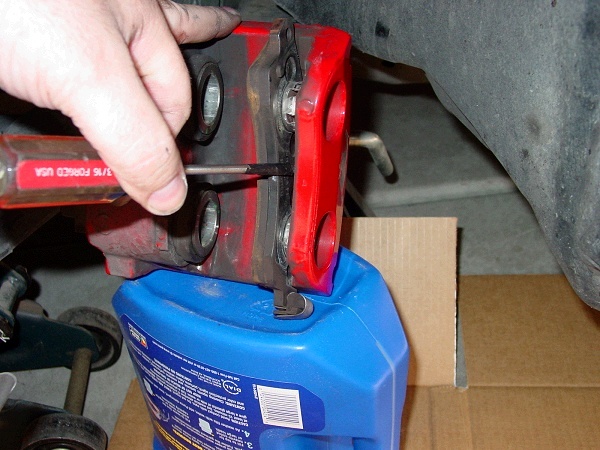
To seat the pads
into the caliper I used a ViseGrip clamp, it is padded and protects the
caliper and pads from damage.
NOTE: Just to be safe when compressing the pistons back into the caliper, instead of forcing the fluid backwards through the ABS unit and the Master Cylinder, first install a hose on the bleed screw, so it can drain into a jar and then loosen the bleeder. This way you are just pushing the fluid out instead of backwards through the system. Don't forget to tight the bleeder screw after the pistons have been seated.
Forcing the fluid back through the ABS unit can damage some types of systems. I was not able to verify that ours would be damaged but why take the chance.
Removing the Rotors
If you are taking the rotors off, then you will need a 15mm socket. Remove the two bolts from the back and remove the bracket. Now the rotors are able to slide off. If they have not been off before, there may be a couple of compession washers that holds the rotors in place during the assembly at the factory. No easy way to get them off but to pry them up and then twist them off with a pair of needle nose. If you really want to put the back they are available at a good hardware store.
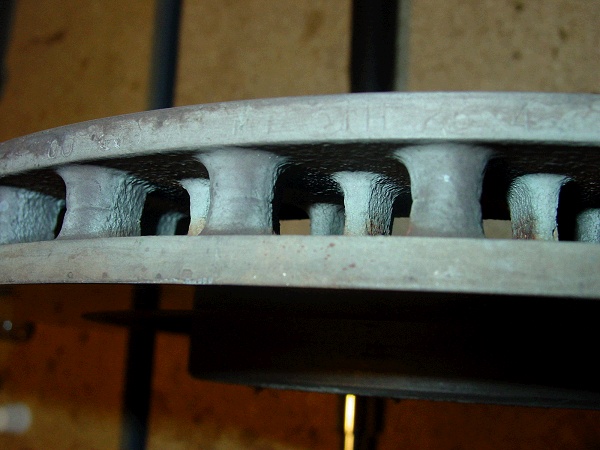
If you are having
the rotors turned, the numbers for minimum thickness are on on the edge
of the rotor, as required by federal law. It is real light and hard to
see, but they are there, you can see a lot better after you clean it off.
If the shop can not find the numbers they will not turn them so you might
as well clean them off now and prevent any future arguements. Again, keep
the neighbor Vern away from the rotors, they are heavier than they look
and he is likely to drop them on the family pet.
I apply a thin coat of anti-seize compound where the rotor contacts the wheel to keep from rusting. Not my idea, the Ford manual shows this.
Put the rotors back in place and install the bracket. Torque the bolts down to 85 ft pounds. Installing the caliper
Tilt the top of
caliper/pads into the bracket and then push the bottom down. You may have
to push the spring ends up to clear the bracket.
Put the pin back
in and install the E-clip.
Put the wheel back on.
Finishing up
Make sure you check your brake fluid and pump the brakes up before starting
the car.
If you installed new pads and or had your rotors turned you will need to brake in your pads and or rotors. I have read a lot of different methods on the net but they are all basically the same.
1. Slow down to about 5MPH from around 40MPH and do that like 5-10 times with a minute driving cool down in between each sesson.
2. Then you do the same thing from like 50-60MPH down to like 20mph and again you do that like 5-10 times with a minute driving cool down inbetween.
3. Then park the car and let the brakes cool completely.
4. No hard braking for the next 300 miles.
Some things I do just FYI
On the pads I contour the leading edges so the pads contact the rotor smoothly. For now I have only done the front and not the trailing edge but some manufactures do both.
Also I make sure the area that the pads set in the bracket are perfectly clean and free of any rust or dirt. If the pads are not allowed to slide easily in the bracket then they will not release and wear quickly.
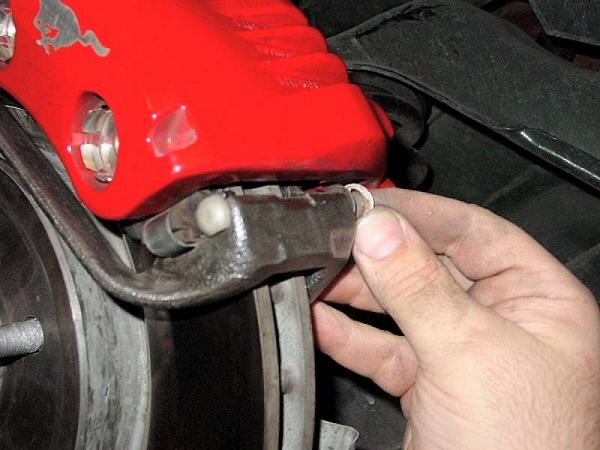
Here you can see
where the pads rub on the bracket and the rust that sourounds the area.
Some people apply a small amount of Silicone brake grease here to make
sure it rides smoothly. Since I don't have a problem with squeaking I
will leave it like it is for now.
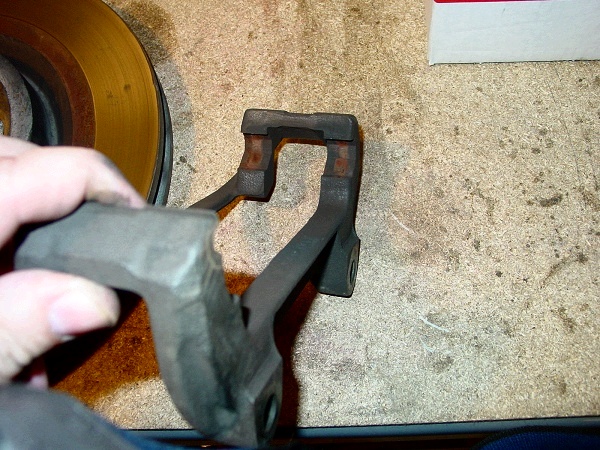
If you have the
bracket off you can put the pads in to make sure they move freely back
and forth.
found @ http://www.bullittarchive.com